CLICK HERE!!
Above is the link to a three part Glog that I did on Bones. It contains a lot of information on bones and their development. It also has a couple pretty cool diagrams on the parts of the skeleton I had to cover for our contest in class.
Wednesday, December 21, 2011
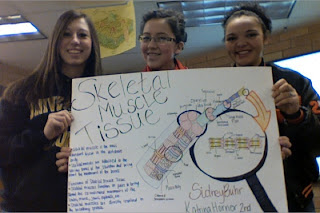
Skeletal Muscle Tissue, Muscle Anatomy Poster
My anatomy class has been working on understanding the muscle system. And we divided the last bits of information into three different sections. The three sections are: Muscle Anatomy, Sliding Filament Model, and Neuromuscular Junction. Sidney, Katrina, and I decided to take on the muscle anatomy. And we thought the best way to show what we've learned would be to make a poster. On our poster we drew and colored an example of the anatomy of muscle. And then we labeled the different parts.
Here is our poster:
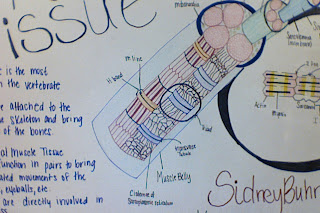
This is the muscle belly. We drew it so you could see the inside, where the triad is located.

This picture above shows the extensions of the fasicle.

And this last picture shows the "zoom in" on the contractible bands in the muscle.
This poster was a lot of fun to make. And I definitely learned more about the different parts of skeletal muscle and how it works.
Tuesday, December 20, 2011
Electromyogram (EMG) Lab Analysis

Hypothesis: IF several different foods are chewed, THEN the reading of the EMG of the masseter muscle function will be higher, BECAUSE the foods that are harder to chew will require more from the muscle to chew these foods.
Materials:
Vernier EKG sensor
Electrode tabs
MacBook
BBQ Chips
Carrots
Chocolate Chip Cookies
Bananas
Dr.Pepper
Celery
Beef Jerky
Pudding
Procedure:
1: Attach the electrode tabs to the upper cheek, the jaw, and arm.
2: Attach the electrode tabs to the sensor, plug the sensor into the USB port on the MacBook.
3: Start up the LoggerPro application on the MacBook to record the data.
4: Start recording the EMG data.
5: Relax jaw for five seconds while recording the data.
6: Clench jaw for five seconds, while recording the data.
7: Repeat steps 5 and 6, but instead chewing all of the different foods, instead of clenching the jaw.
8: Analyze the data gathered on each graph from each different food. Find the change in millivolts for each food.
9: Compare the results.
(Data is located above)
Conclusion:
When I look at the data we collected from this lab, I think that my hypothesis was right. The pudding was the only confusing food. Obviously pudding is soft so it would be assumed that it wouldn't take that much work from the muscle to chew the pudding. But I concluded that the first initial chew to get the first bite of pudding from the spoon into the mouth is what causes the reading to be so high. Besides the pudding the other readings make sense. The jerky and carrots required more work then just slurping the Dr.Pepper. Therefore, from the data, I have found that the harder a muscles has to work to provide a reaction, the more electricity there will have to be to do that work.
Subscribe to:
Comments (Atom)